Easy Drawings For 11 Year Olds Characters in video games seem to fall into different categories based on their persistent appeal. While certain characters are destined to become icons that practically everyone is familiar with, others have a significant fan base.
The best Sonic art
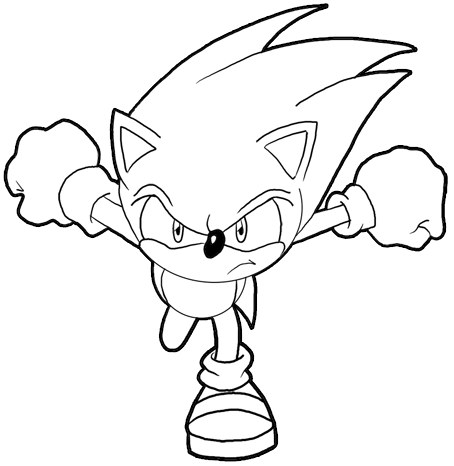
Sonic the Hedgehog, who has been involved in action-packed adventures ever since his debut in 1991, is one of these renowned heroes. Easy Drawings For 11 Year Olds you feel yourself to be one of his throngs of admirers, perhaps you’ve desired to learn how to sketch him to honor your devotion.
To make the operation as rapid as the nimble hedgehog himself, we’ve produced this step-by-step instruction on how to design Sonic in only 9 simple steps!
Detailed Sonic Drawing
1:
- We will take care to incorporate every one of Sonic’s pretty obvious design elements! We’ll start with one of those qualities straight away—his spikey back!
- Start by drawing a horizontally curved line for the top of the spikes. Using a series of progressively curved lines that end in points, we will be adding three points to his spikes.
- To help you visualize where everything will go, lightly trace a circle around his head’s position relative to his spikes.
2:
- At that point, you can start drawing his head.
- We will be adding to the beginning of Sonic’s head outline for the succeeding phase of your drawing. To indicate his ear, simply add a triangle line to the end of the curved line you drew.
- Then, using the reference image as a guide, add a curved line to create the front of his head.
- It could be a good idea to draught this portion in pencil first before finishing it in pen as it could use some practice.
3:
- Add Sonic’s second ear and the remainder of his head.
- The remainder of Sonic’s head will be drawn in the following portion of our lesson on how to draw Sonic.
- By lightly overlapping the ear you sketched in step 2 with it, you may add a curved line to the top of his head.
- After drawing it, you may add a second pointed ear that mirrors the original one and then flip his face around so the pointed ear is on the opposite side.
- Once you’ve finished, your Sonic head is complete, and you may move on to the next step!
4:
- Draw in Sonic’s first arm at step four.
- Make sure to incorporate a curved line to make Sonic’s smiling mouth inside of his head before you add the first arm to your image!
- That can be positioned by the reference image. Then a straight arm will start to extend from the top of his skull.
- The contour of his gloved hand is then created by adding a few more curved lines; closely imitating the image to achieve the same result.
- Once you’re satisfied with his arm, gently add a downward line with a point for his tail.
5:
- Step five is to give Sonic his other arm and stomach.
- After drawing with one hand, adding the second one shouldn’t be a problem.
- Given that it will be a mirror image of the first arm you sketched, adding in his other arm should be much easier, especially using the reference image as a guide.
- Once the other arm is complete, you can add a stomach to Sonic by drawing a long, curved line. Even though this line should virtually meet the opposite side of his body in the next phase, make sure to leave space for his leg.
6:
- Let’s give Sonic some legs.
- It’s time to incorporate some legs with some speed in your Sonic drawing since without them, Sonic wouldn’t be Sonic.
- Draw his legs in small, straight lines to add the first few lines. One of them will take over the space you just left.
- He makes big, spherical exhibitions, and his socks are made of two squat shapes.
- I do not doubt that you’ll make a superb job of drawing his legs if you use the reference photograph!
7:
- At this stage, we can add Sonic’s face.
- In the second section of our tutorial on drawing Sonic, we’ll give the nimble hero a face.
- You may give him eyes by inserting two tiny, solid-black forms into each of the two long oval shapes.
- He also has a big, rounded contour around his eyes, as seen in the picture. Make sure to draw that properly before giving him a rounder nose.
- You may add more lines at the end to give his ears some dimension.
8:
- After that, we’ll add a few last things.
- You just need to add a few finishing touches to your Sonic drawing.
- As seen in the reference image, you can add some basic lines to the man’s tummy, hands, and feet. These additions are followed by just one additional step.